How to Add a Custom Connector in Claude
May 13, 2026
May 13, 2026
June 26, 2026
June 26, 2026

Claude is a capable AI on its own. But connect it to your project management system, CRM, or internal database, and it becomes something more: an AI that works with your actual data.
Custom connectors in Claude make that possible. They let you link Claude to any external service running a remote MCP server, putting your tools and Claude in the same conversation.
Here's what this article covers:
- What custom connectors are and how they differ from directory connectors
- What you need before you start
- Step-by-step setup for Pro/Max and Team/Enterprise plans
- How to enable, edit, and remove connectors
- How to connect Claude to your tools for meeting-heavy workflows
If you're still evaluating which AI tool fits your workflow, this Claude vs Gemini comparison breaks down the key differences.
TL;DR: How to add a custom connector in Claude?
On Pro or Max, go to Customize > Connectors, click +, select Add custom connector, paste your remote MCP server URL, and authenticate.
On Team or Enterprise plans, an Owner must add the connector first via Organization Settings > Connectors > Add > Custom > Web, then members connect individually.
What Are Custom Connectors in Claude?

Custom connectors let you link Claude to external tools and data sources through remote MCP servers. MCP stands for Model Context Protocol, an open standard created by Anthropic that defines how AI applications connect to external tools and data.
When you add a custom MCP connector, Claude can access and act on information from connected services directly inside your conversation. That means Claude can pull structured data, create records, search files, or trigger actions in tools you already use, without you needing to copy and paste anything.
Claude's connectors directory lists pre-verified integrations you can add in one click. Custom connectors are different. They let you connect Claude to any service that supports MCP, including internal tools, third-party apps not in the directory, or servers you've built yourself.
Here's when a custom connector makes sense over a directory connector:
- The tool you need isn't listed in the connectors directory
- You've built a private or internal MCP server for your team
- You want Claude to access proprietary data from your own infrastructure
- You need a specific tool configuration that the directory version doesn't support
💡 Pro tip: If you just need meeting transcripts, summaries, and action items without any custom setup, Tactiq handles the full meeting workflow out of the box.
What to Prepare Before Adding a Custom Connector
Before you add a custom connector in Claude, make sure you have everything in place. Missing any of these will stop the setup midway.
A remote MCP server URL
This is the core requirement. The server must be publicly accessible over the Internet. Claude connects to it from Anthropic's cloud infrastructure, not from your local machine. This applies across every Claude client, including:
- Claude.ai
- Claude Desktop
- Claude Code
- Claude Cowork
- Mobile apps
Servers behind a VPN, on a private corporate network, or blocked by a firewall won't connect. If your server is on a private network, you'll need to allowlist Anthropic's IP addresses so inbound connections can reach it.
The right Claude plan

Custom connectors are available on Free, Pro, Max, Team, and Enterprise plans. Free users can add one custom connector. Pro, Max, Team, and Enterprise plans support multiple connectors.
Owner access for Team and Enterprise plans
Individual members can't add custom connectors to a Team or Enterprise organization on their own. An Owner or Primary Owner must set up the connector first via Organization Settings. Once that's done, members connect individually.
OAuth credentials (if required)
Some remote MCP servers require OAuth authentication. If yours does, have your OAuth Client ID and Client Secret ready before you start. You'll enter these under Advanced Settings during setup.
Here's a quick checklist of the requirements before you begin:
- Remote MCP server URL (publicly accessible)
- Claude account on any plan (Free is limited to one connector)
- Owner access if you're on Team or Enterprise
- OAuth Client ID and Secret if your server requires authentication
How to Add Custom Connector in Claude
The setup process differs depending on your plan. Follow the steps for your account type below.
For Pro and Max plans

- Go to Customize > Connectors in your Claude account.
- Click +, then select Add custom connector.
- Enter your remote MCP server URL.
- Optionally, click Advanced settings to enter an OAuth Client ID and OAuth Client Secret.
- Click Add to finish.
For Team and Enterprise plans (Owner steps)
Only an Owner or Primary Owner can add a custom connector to the organization. Members cannot do this themselves.
1. Go to Settings > Organization Settings > Connectors.
2. Click Add.

3. Hover over Custom, then select Web.
4. Enter your remote MCP server URL.
5. Optionally, click Advanced settings to enter an OAuth Client ID and OAuth Client Secret.
6. Click Add to finish.
For Team and Enterprise members (after Owner setup)
Once an Owner has added the connector, members connect individually:
- Go to Customize > Connectors.
- Find the connector in the list. It will have a Custom label.
- Click Connect to authenticate and enable it.
Enabling a connector per conversation
Adding a connector doesn't automatically enable it in every chat. To use a connector in a specific conversation:
- Click the + button in the lower left of your chat interface.
- Select Add connectors.
- Toggle on the connector you want to use.
How to remove or edit a custom connector
Claude doesn't have a direct edit option for custom connectors. To update a connector, you need to remove it first and re-add it with the updated details.
To remove a connector:
- Go to Customize > Connectors.
- Find the connector you want to remove.
- Click Remove or select the three dots next to it.
- Follow the prompts to confirm.
Team and Enterprise Owners can remove connectors on behalf of the organization via Organization Settings > Connectors.
Automate Your Meeting Workflows With Tactiq
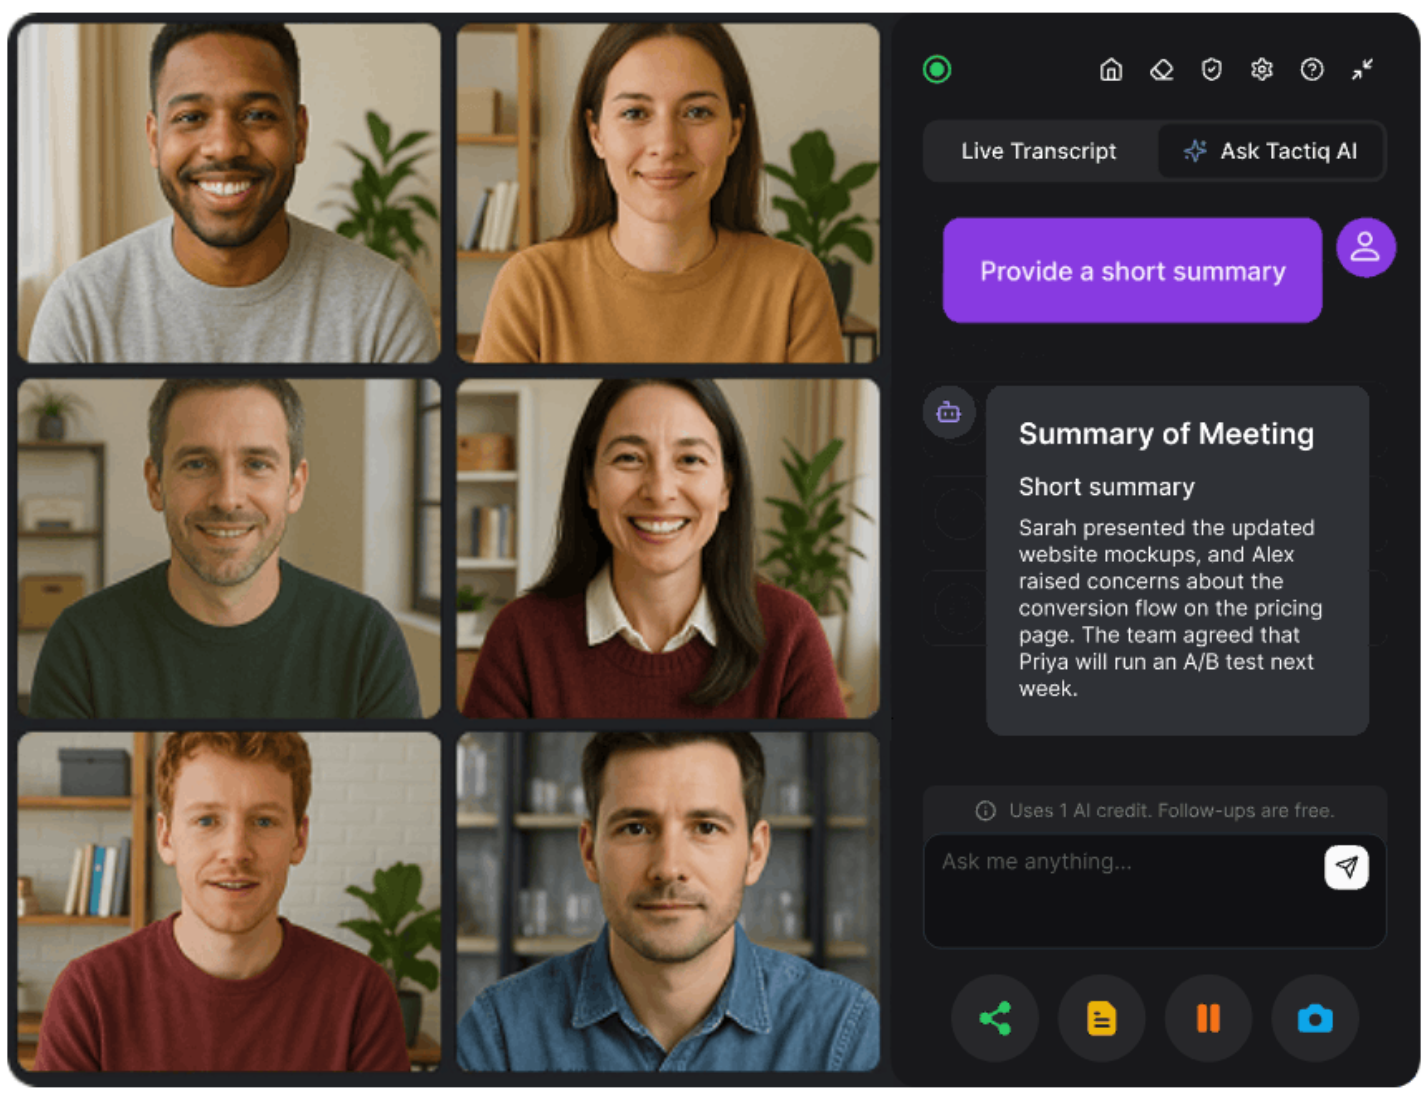
Tactiq automatically transcribes your Google Meet, Zoom, and Microsoft Teams calls. No bots or manual exports. Just install the Tactiq Chrome extension and every call becomes a searchable transcript with speaker labels.
You can also connect Tactiq directly to Claude using the Tactiq MCP server. Once connected, Claude can search your meeting history, surface action items, and pull context from past calls without you leaving the chat.
{{rt_cta_ai-convenience}}
How to connect Tactiq MCP on Pro or Max
1. Go to Customize → Connectors in Claude.
2. Click +, then select Add custom connector.
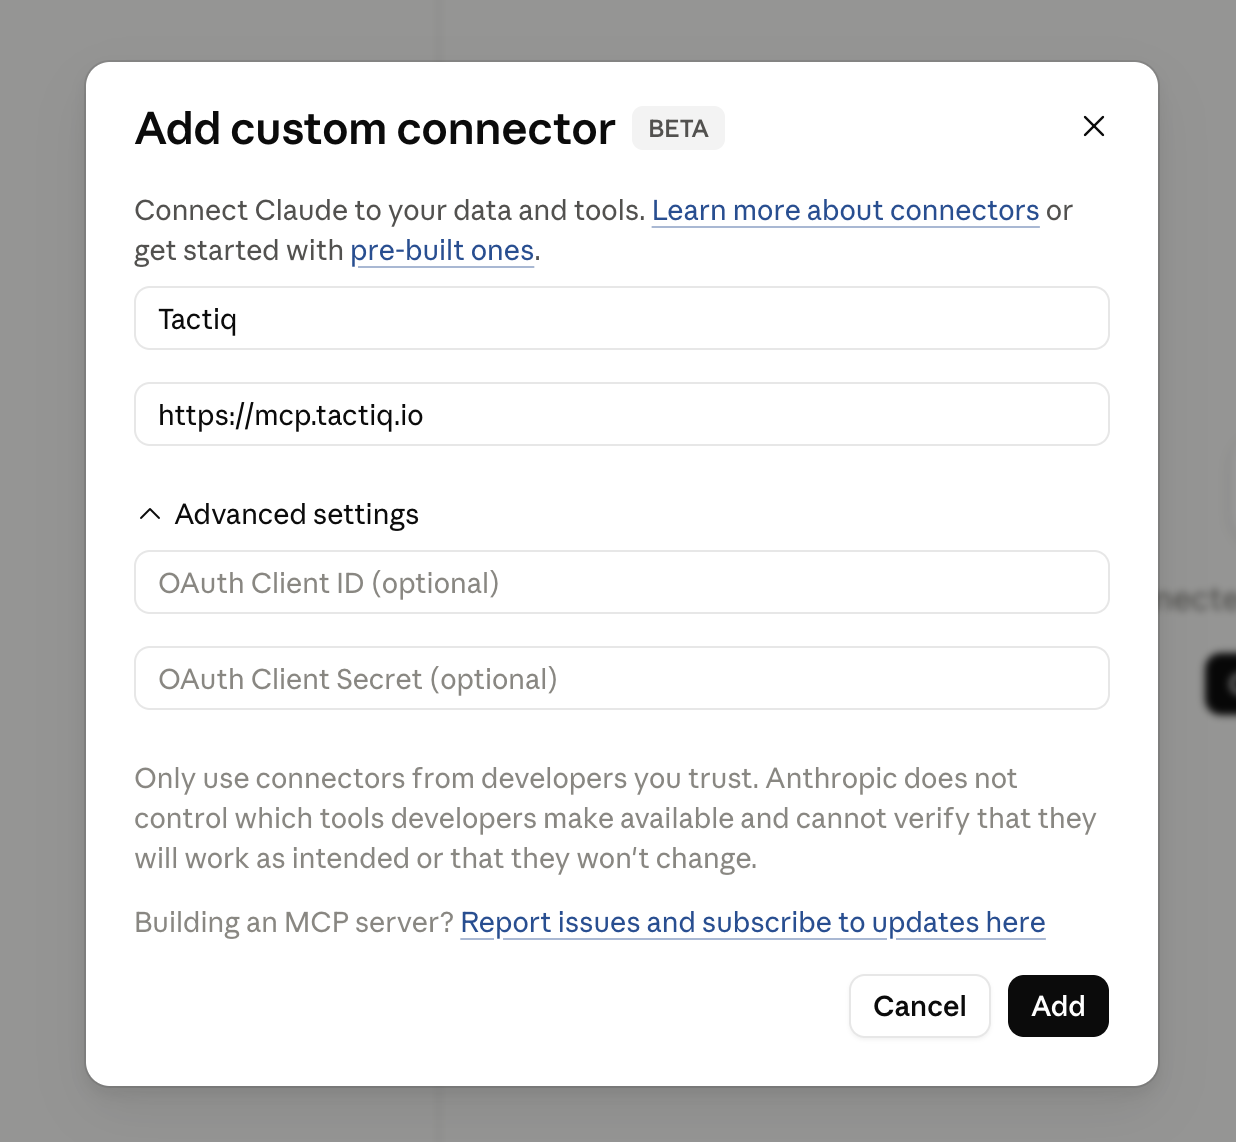
3. Enter the name Tactiq MCP and the server URL: https://mcp.tactiq.io
4. Click Add, then Allow to authorize your Tactiq account.
How to connect Tactiq MCP on Team or Enterprise
A Workspace Owner must add the connector first.
- Go to Organization Settings → Connectors in Claude.
- Click Add → Custom → Web.
- Enter https://mcp.tactiq.io and click Add.
Once the Owner has added it, each member goes to Customize → Connectors and clicks Connect to link their own Tactiq account.
Note: On free and Pro Tactiq plans, Claude can search and list your meetings. Reading full summaries requires a Tactiq Team plan. See the full setup guide here.
Install the Tactiq Chrome extension for free and start turning your next meeting into clear outcomes before you've even left the call.
Start Connecting Claude to Your Tools Today
Adding a custom connector in Claude takes just a few steps. Get your remote MCP server URL ready, navigate to the right settings page for your plan, paste the URL, authenticate, and enable the connector in your first conversation.
Once connected, Claude can pull data, take actions, and work across your stack without any manual copying or switching between apps. And if meetings are a core part of how your team operates, pair your connected tools with Tactiq to close the loop. Every conversation is captured, summarized, and ready to feed into whatever workflow you've built.
The process is the same on Mac as on any other device. Custom connectors are configured through your Claude account, not your local machine. Go to Customize > Connectors, click +, select Add custom connector, enter your remote MCP server URL, and authenticate. If you're on a Team or Enterprise plan, an Owner must add the connector via Organization Settings first.
Directory connectors are pre-verified integrations listed in Claude's connectors directory. You add them in one click. Custom connectors let you securely connect Claude to any service running a remote MCP server, including internal tools or apps not in the directory.
No. Custom connectors are available on all plans, including the Free tier. Free users are limited to one custom connector. Pro, Max, Team, and Enterprise plans support multiple connectors.
Yes. Free users can add one custom connector. You'll need a publicly accessible remote MCP server URL to get started.
Claude doesn't have a direct edit option. To update a custom connector, remove it first and re-add it with the updated details. To remove: go to Customize > Connectors, find the connector, click Remove or the three dots next to it, and confirm. Team and Enterprise Owners can do this via Organization Settings > Connectors.
Related articles


Want the convenience of AI summaries?
Try Tactiq for your upcoming meeting.
Want the convenience of AI summaries?
Try Tactiq for your upcoming meeting.
Want the convenience of AI summaries?
Try Tactiq for your upcoming meeting.