How to Send a Google Meet Invite
August 2, 2023
August 2, 2023
June 12, 2025
June 12, 2025
Google Meet has become a popular choice for video conferencing, especially among Google Workspace users, allowing you to connect with colleagues and clients no matter where they are. Sending Google Meet invites is an easy process that ensures everyone is in the loop.
In this guide, you'll learn how to send Google Meet invites. Plus, we'll share tips on inviting guests and managing your meetings like a pro. For additional tips, explore these related articles: How to Schedule a Google Meet, How to Create a Google Meet on a School Chromebook, and The Complete Google Meet Guide for a Perfect Meeting.
How to Schedule A Google Meet Session from Desktop or Laptop and Invite Guests
Scheduling a Google Meet session from your computer is flexible and straightforward. You have multiple options: schedule directly from the Google Meet homepage, use Google Calendar for more detailed scheduling, or start a meeting instantly from Gmail. Below, we'll walk you through the steps for each method and show you how to send meeting invitations to your guests for a future meeting.
Option 1: Google Meet Homepage
- Open Google Meet.
- Click ‘New Meeting’, then select ‘Create a meeting for later’.
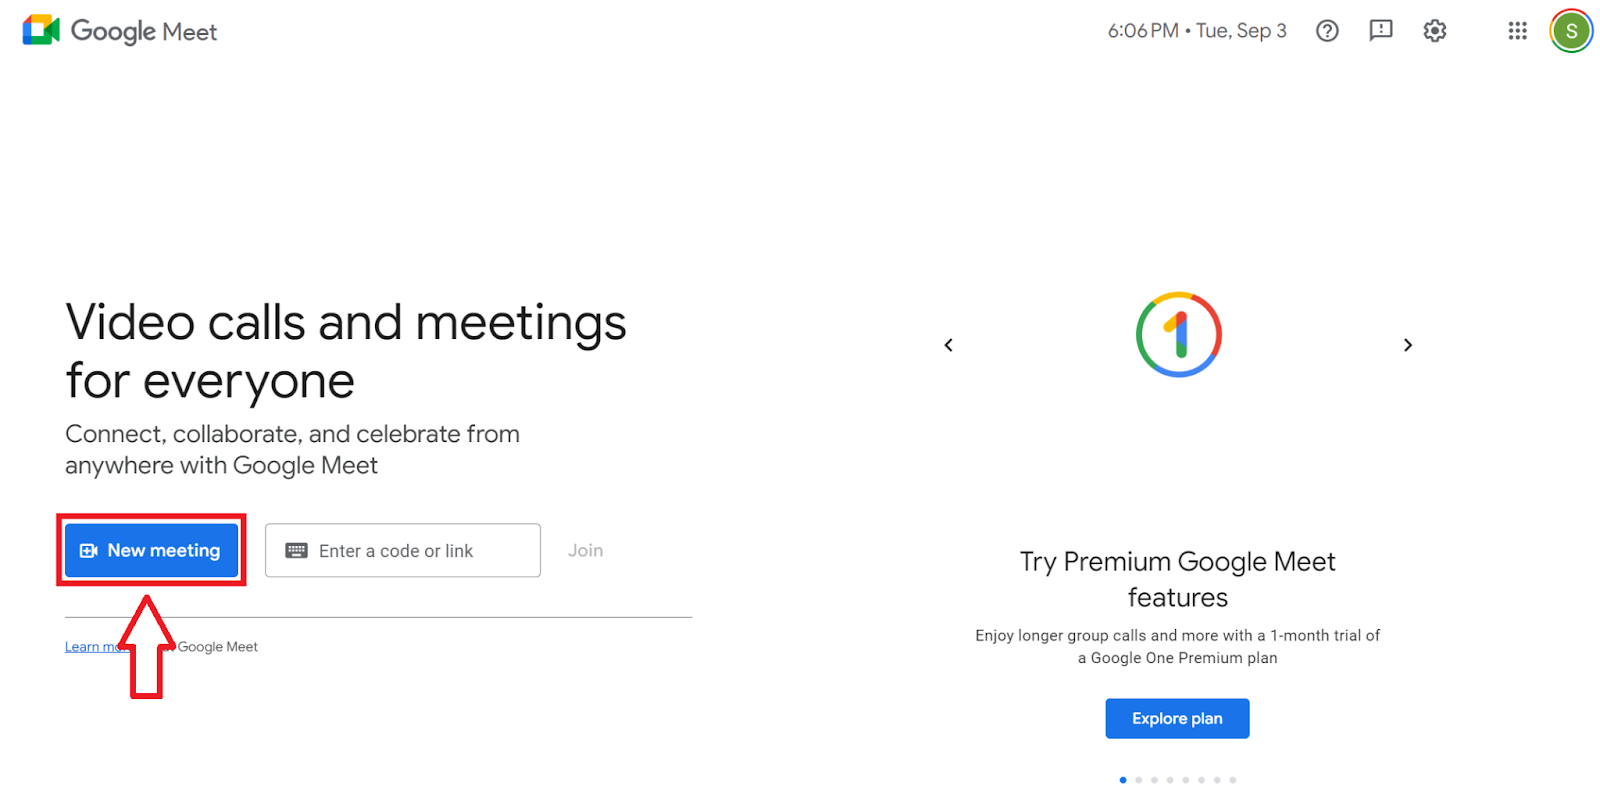
- Copy the generated video meeting link and share it with participants.
- Save a copy of the link for yourself.
Option 2: Google Calendar
- Open Google Calendar.
- Click Create on the left panel and select Event.
- Add a title for your Google Meet session.
- Choose the intended date and time for the event.
- Click Add Guests and enter the names or email addresses of the people you want to invite.
- Click Add Google Meet video conferencing to generate a Google Meet session link.
- Use the Copy conference info icon to share the meeting details and link with your participants.
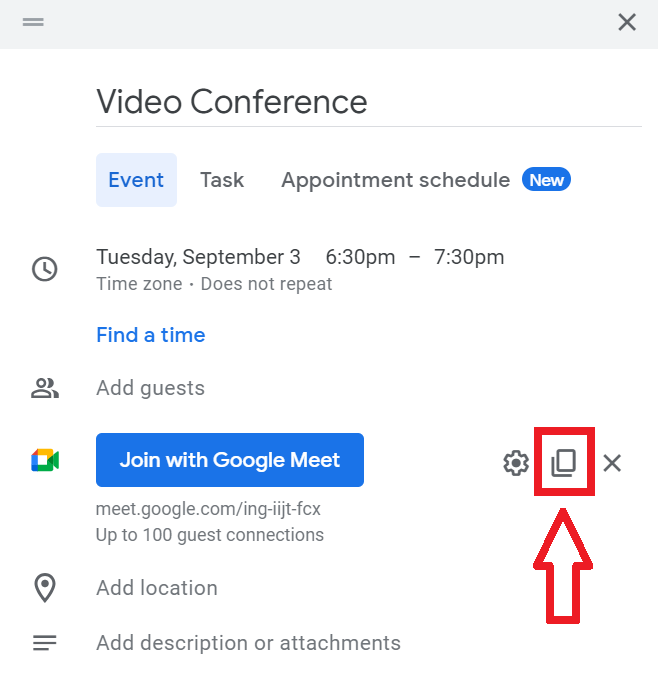
- Click Save to finalize your event.
Option 3: Gmail
- Log in to Gmail.
- On the left side of the page, click the Meet tab, then select New Meeting.
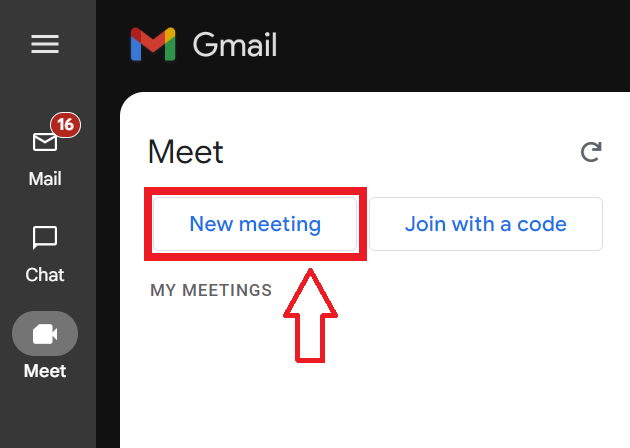
- To share the meeting with others, click Send Invite:
- To copy the invitation link, click Copy meeting invite.
- To send the invitation directly via email, click Share via email.
- When you're ready to join the meeting, click Start Now.
- Make sure to allow camera and microphone permissions when joining the meeting.
How to Remove Google Meet from the Google Calendar Invite
If you decide to remove the Google Meet video conference from your Google Calendar event, follow these steps:
- Open Google Calendar and find the event you want to edit.
- Click on the Edit icon (pencil) to modify the existing event.
- In the event details, locate the video conferencing section.
- Click the Remove (X) icon next to the Google Meet link to delete the video conference.
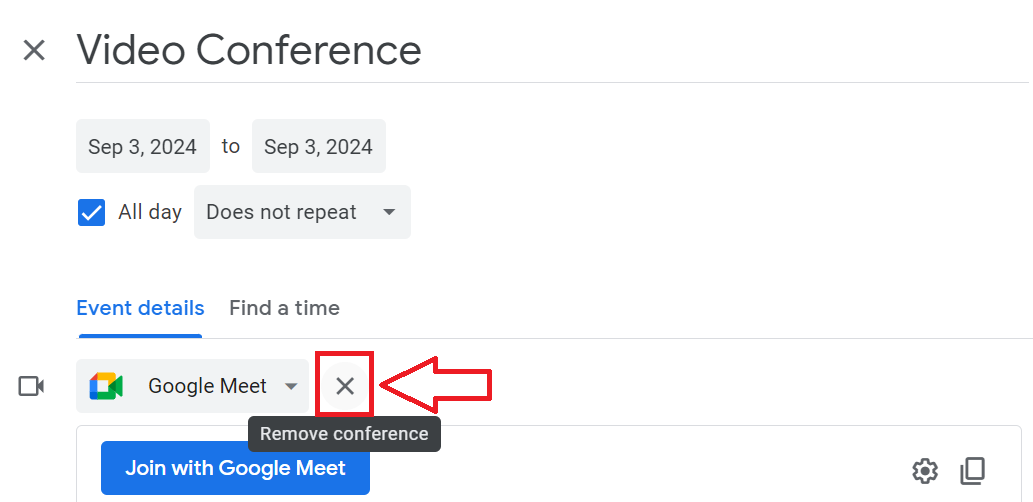
- Click Save to finalize the changes and deactivate the meeting link.
How to Schedule A Google Meet Session Using Mobile
No desktop or laptop? No problem. Google Meet allows you to schedule meetings directly from your Android or iOS device. Here’s how:
Using Android
- Open the Google Calendar app.
- Tap New in the lower right corner of the screen, then select Schedule in Google Calendar. The video conferencing details are already added to the event.
- Add a title for your Google Meet session and adjust the details as needed.
- Tap Add people to invite your guests.
- Tap Save to finalize the event.
Using iOS
- Open the Google Calendar app.
- Tap New in the lower right corner of the screen, then select Schedule in Google Calendar. The video conferencing details are already added to the event.
- Add a title for your Google Meet session and adjust the details as needed.
- Tap Add people to invite your guests.
- Tap Save to finalize the event.
{{rt_cta_ai-convenience}}
Step Up Your Google Meet Sessions with Tactiq
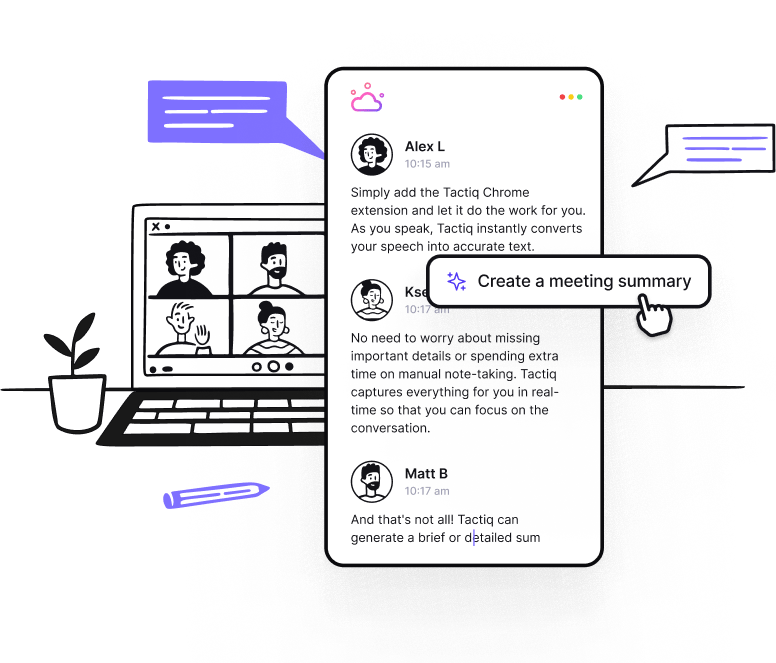
Looking to supercharge your Google Meet sessions? Tactiq is the perfect tool, offering integration with Google Meet that goes beyond simple transcription.
- Capture and Highlight Key Moments: Tactiq automatically transcribes your meetings. You can easily highlight key moments within the transcription, making it simple to pinpoint and share essential discussions with your team.
- Unlock Deeper Insights with AI Prompts: Get tailored meeting insights using custom AI prompts. Ask Tactiq AI any question about your meeting to dive deeper into the discussion and discover actionable insights. You can even save your prompts and build a personalized AI library tailored to your job and role, making each meeting more effective and focused.
- Master Efficiency with AI Meeting Kits: Tactiq also offers AI Meeting Kits that allow you to tailor GPT AI prompts to automate actions based on your discussions. This feature helps you create personalized AI meeting notes for each session, streamlining your workflow and ensuring every meeting ends with clear, actionable items.
Install Tactiq on your computer and start benefiting from these features:
- Visit the Chrome Web Store.
- Click Add to Chrome and then select Add Extension.
- Open Google Meet, and you'll find the Tactiq widget on the right-hand side of the screen.
Tactiq empowers you to make the most of every meeting, whether you're managing a small team or hosting a large conference. Use Tactiq today to make your Google Meet more productive, insightful, and impactful.
You can send a Google Meet invite by scheduling a meeting from the Google Meet homepage, Google Calendar, or Gmail. Each method lets you generate a meeting link and share it with your guests, so everyone stays informed and ready to join.
Open Google Calendar, create a new event, add your meeting title, date, and time, then click 'Add Guests' to enter email addresses. Adding Google Meet video conferencing generates a link, which you can share directly, making it simple to coordinate with your team.
Edit your event in Google Calendar, find the video conferencing section, and click the 'Remove' (X) icon next to the Google Meet link. This ensures your invite no longer includes a video meeting, helping you keep your calendar events accurate.
Yes, you can use the Google Calendar app on Android or iOS to schedule a Google Meet. Just tap 'New,' select 'Schedule in Google Calendar,' add your details and guests, and tap 'Save'—so you can organize meetings on the go.
Tactiq automatically transcribes your meetings, lets you highlight key moments, and uses AI prompts to deliver actionable insights. You save time and gain deeper understanding, making every meeting more productive and focused.
Want the convenience of AI summaries?
Try Tactiq for your upcoming meeting.
Want the convenience of AI summaries?
Try Tactiq for your upcoming meeting.
Want the convenience of AI summaries?
Try Tactiq for your upcoming meeting.


_Main.jpg)


