Everything You Need to Do for a Google Meet Test
March 29, 2025
March 29, 2025
July 21, 2025
July 21, 2025
Before jumping into a Google Meet video call, it’s a good idea to run a quick test. A frozen screen or muffled mic can throw off the entire conversation. A solid setup helps you feel more prepared and confident when meeting with a client, your team, or a new hire.
In this guide, you’ll learn how to test your audio and video, adjust your camera settings, and ensure everything’s working before the call even starts. You can also check out the complete Google Meet guide for the perfect meeting.
How to Do a Google Meet Test
Testing before your call only takes a minute and can prevent awkward tech issues later. Google Meet has built-in tools that make this part easy. Let’s start in the Green Room.
Google Meet Green Room
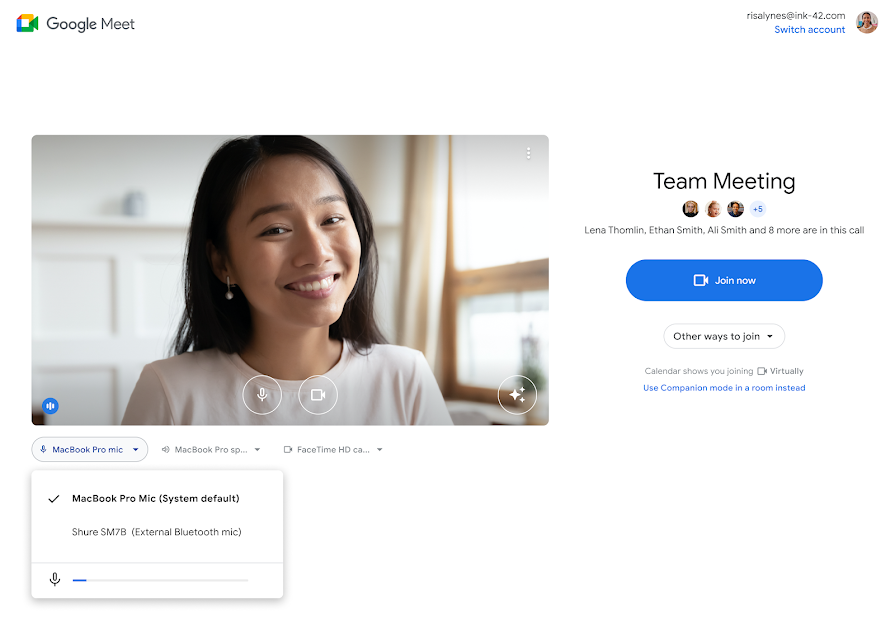
Image from Google
When you start a Google Meet call, you’ll land in what’s called the Green Room. This is your chance to do a green room self-check before anyone else joins. It shows a preview of your camera and lets you test your mic, speaker, and camera.
Click “Check your audio and video” to open a panel where you can test everything—no need to join the actual meeting. This is the best spot to adjust your audio-video settings and troubleshoot early.
Test your mic
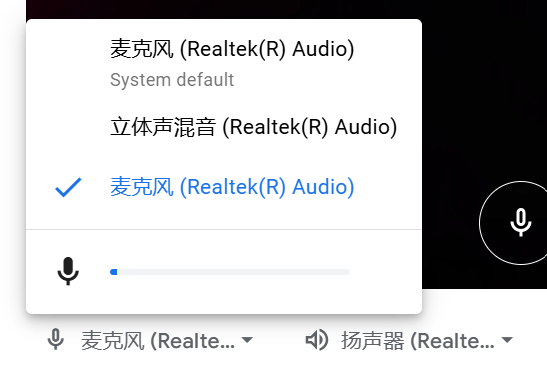
In the Green Room, go to the mic settings and speak normally. If the sound bar moves while you talk, your mic is working. If it doesn’t, try switching to a different mic from the dropdown.
You can also adjust your audio settings during a call. Just click the small arrow next to the mic icon, and a pop-up will show your available audio devices. Use the dropdown next to the microphone label to pick the one you want.
Heads-up: Echo or feedback often happens when your microphone picks up sound from external speakers. To fix it, use headphones or a headset with a built-in mic. You can also check your audio settings to ensure your input and output devices are properly paired.
Test your video

Back in the Green Room, you’ll see a preview of your camera. This helps you check lighting, framing, and what’s behind you. If your camera isn’t showing up, try selecting a different one from the video dropdown.
Test your audio

To check your audio, click the Speaker icon in the Green Room, then select “Test Speakers.” Here, you can play a short clip to hear a test sound and confirm your speakers are working. If you don’t hear anything, try changing your speaker device using the dropdown menu.
You might need to adjust your speaker microphone settings if there’s still no sound. Also, keep the volume up and make sure nothing’s muted on your device.
Test your internet speed
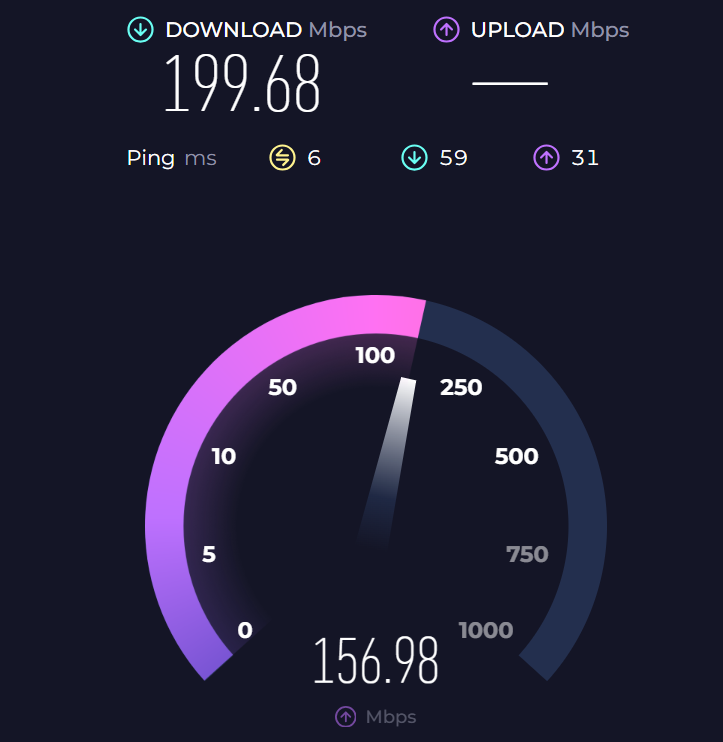
Even with perfect audio and video settings, a weak connection can cause lag or dropped calls. Before your meeting, run a quick internet speed test using a site like Speedtest.net or Fast.com.
Look for upload and download speeds above 3 Mbps for stable video calls. If things are slow, try moving closer to your router, switching to a wired connection, or asking others to pause streaming during your call. Strong internet = better audio and video quality during your Google Meet.
Things to Set Up Before Your Call
Now that your mic, camera, and connection are good to go, let’s make sure your meeting setup is just as ready. These extra steps can help you stay focused, look more professional, and avoid last-minute surprises.
Set up a background
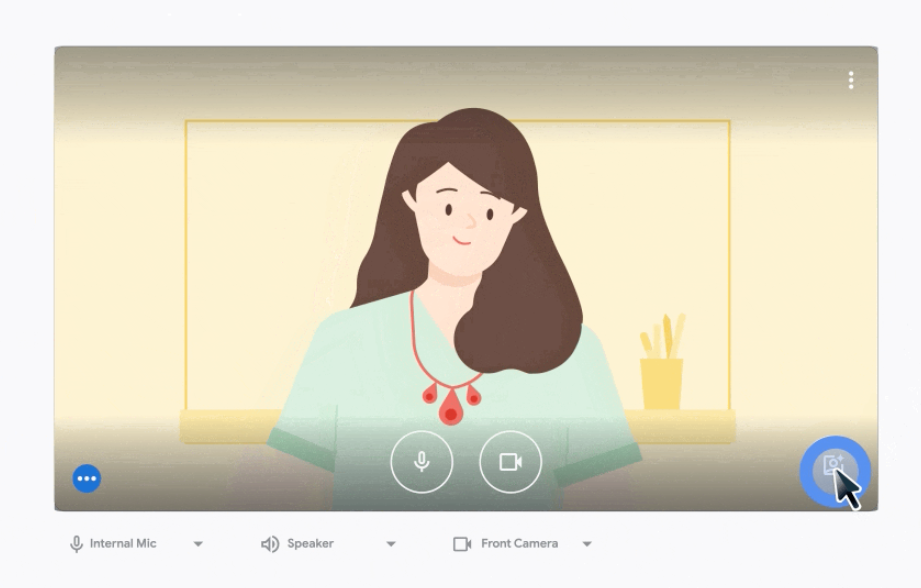
Image from Google
Before you join, take a moment to tidy up your on-camera space—or just use a Google Meet background to keep things distraction-free. In the Green Room, click the effects icon (the sparkle symbol) to blur your background or choose a virtual one.
Pick something simple that won’t steal attention. A neutral image or soft blur works great for most calls. This small step helps keep the focus on you, not what’s behind you.
Test screenshare

If you plan to present slides, show a doc, or demo something, it’s smart to test your screenshare in advance. Open a Google Meet and click the “Present now” button at the bottom. You’ll see options to share your entire screen, a window, or a tab.
Choose one and make sure everything loads correctly. If your screen is blank or laggy, close unnecessary apps or browser tabs. This also gives you a chance to double-check what’s visible—no surprises when you go live.
Share your audio on Google Meet
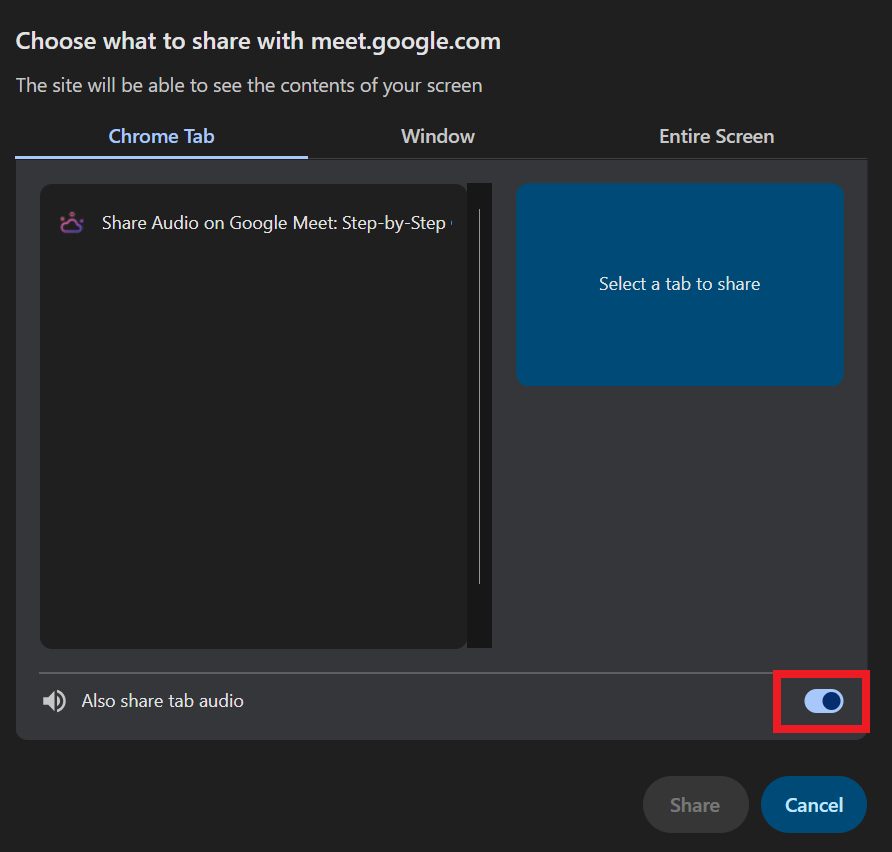
If you’re presenting a video or any media with sound, don’t forget to share your audio on Google Meet. When you click “Present now,” choose “A tab” to share a browser tab and check the box that says “Share tab audio.”
This ensures everyone can hear the sound clearly—whether it’s a demo, a training video, or background music. If you're using another option like "Entire screen," your audio might not carry over, so double-check before you go live.
Record Google Meet
Need a backup of everything discussed? You can record Google Meet calls directly from the meeting window. Click the three-dot menu in the bottom-right corner and select “Record meeting.” A prompt will appear to ask for consent—once accepted, the recording starts.
The video file is saved to your Google Drive, and a link gets emailed to you. This is especially helpful for training sessions, interviews, or when someone on your team can’t join live. Just remember to let everyone know you’re recording before you begin.
Prepare note-taking
Even if the call goes smoothly, it’s easy to forget details. Before you join, decide how you’ll keep track of key points. You can take notes in a doc, jot things down on paper, or take notes in Google Meet using a live transcription tool like Tactiq.
Tactiq can automatically capture what’s said during your call and turn it into smart, searchable notes. Let’s look at how it works.
{{rt_cta_ai-convenience}}
How to Use Tactiq
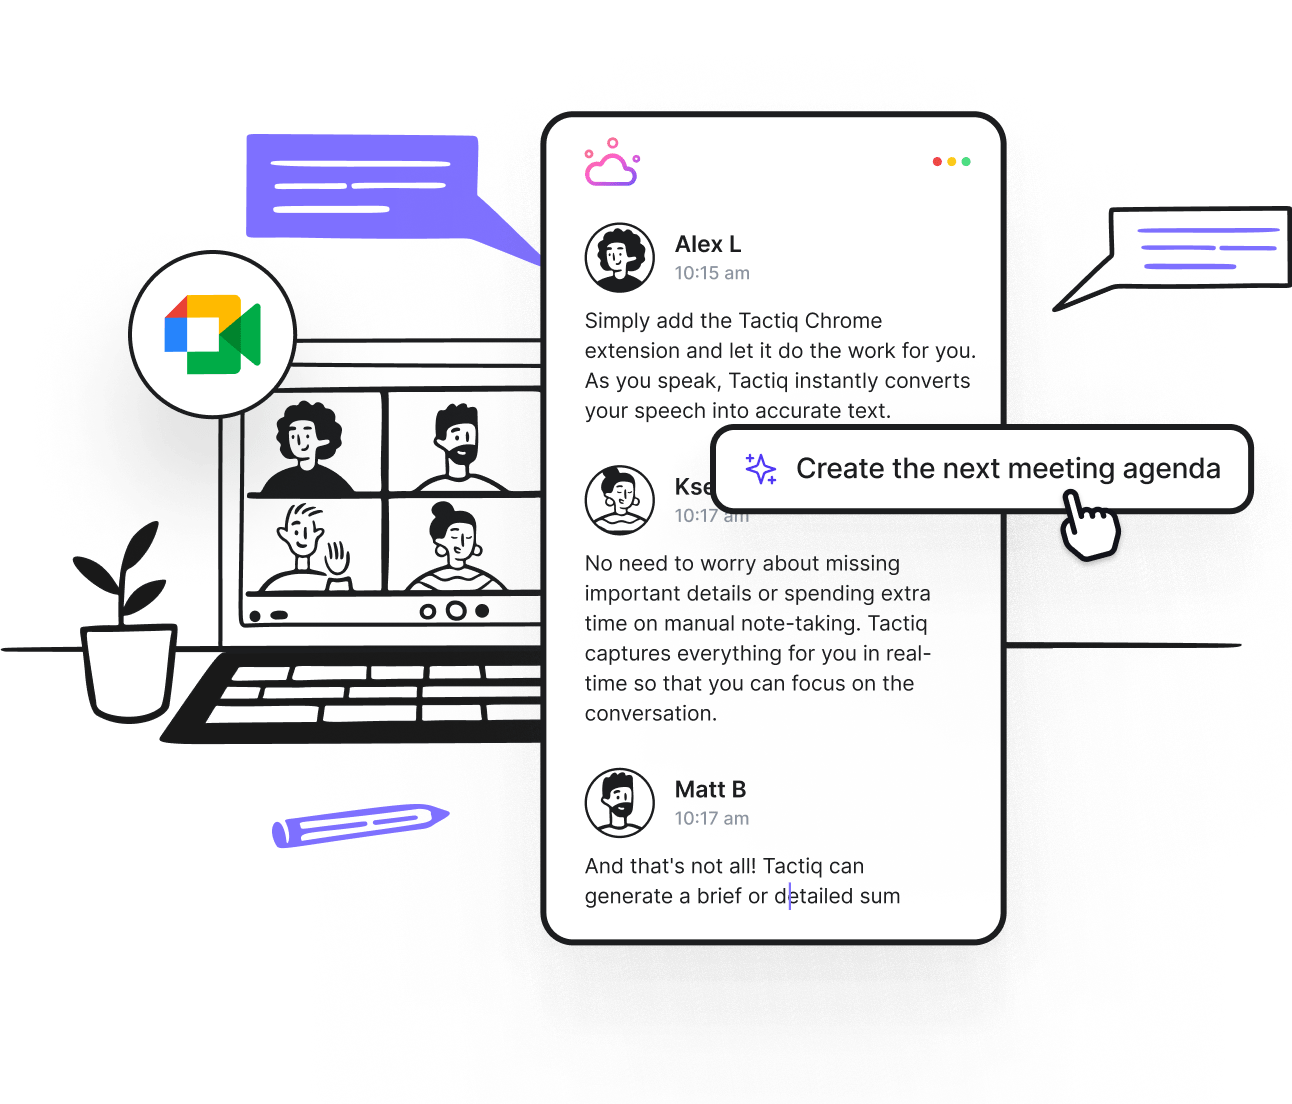
Tactiq is a smart transcription tool that works with every Google Meet meeting—without the need to record. Once you install the free Chrome extension, it automatically joins your call and starts transcribing in real time, right alongside your conversation.
Here’s what you can do with it:
- Transcribe your Google Meet call with real-time captions and a complete transcript.
- Highlight key moments during the meeting to quickly find decisions or action items.
- Use built-in AI to summarize the meeting, draft follow-up emails, or turn your notes into project updates.
- Export everything to tools like Google Docs, Notion, HubSpot, or Slack to keep your workflow moving.
- Access transcripts from past meetings anytime through your Tactiq dashboard.
- Upload audio or video files to generate transcripts even after a meeting ends.
Tactiq also shows who said what during the call, supports over 50 languages, and gives you the power to build your own custom prompts for recurring tasks. It’s more than a note-taker—it’s a time-saver for anyone who leads or attends regular calls.
👉 Download the free Tactiq Chrome Extension and try it in your next Google Meet!
Final Check Before You Join
Running a quick Google Meet test before your call can make a big difference. A few minutes of checking your mic, camera, and internet connection helps you avoid last-minute tech stress. Once you’re in the meeting, tools like Tactiq can handle the note-taking so you can focus on the conversation.
From adjusting your audio and video settings to choosing the right Google Meet background, everything you do ahead of time helps you show up more prepared.
Ready to try it out?
Install the free Tactiq Chrome Extension and make your next Google Meet your most productive one yet.
Yes. Use the green room to preview your camera and mic, and make sure everything works before entering the meeting.
Before you begin a Google Meet video call, test your mic, camera, speakers, and internet connection. Also, check your lighting, pick a background, and open any docs or slides you plan to share.
Check your mic in the settings menu. If the sound bar doesn’t move, try switching input devices or closing apps that might be using your mic. You can also adjust your speaker microphone settings inside the meeting.
Make sure you have good lighting, a clean camera lens, and a stable internet connection. If needed, adjust your video settings in the Green Room or during the call.
Yes. You can start a solo meeting and access the Green Room to test audio and video before others join.
Want the convenience of AI summaries?
Try Tactiq for your upcoming meeting.
Want the convenience of AI summaries?
Try Tactiq for your upcoming meeting.
Want the convenience of AI summaries?
Try Tactiq for your upcoming meeting.


_Main.jpg)


