How to Take Screenshots on a Zoom Meeting
July 19, 2022
July 19, 2022
June 12, 2025
June 12, 2025

When you’re leading or participating in a Zoom meeting, there may be times when you need to take a screenshot. This can be to capture something on the screen for later reference or to show someone else what is happening on your computer.
How to Take Screenshots Using Mac or Windows (Built-In Feature)
You can use your computer’s built-in screenshot because it’s easy or try a free extension Tactiq.io.
How to Take Screenshots on a Mac
There are two options: save the entire screen or save a part of the screen.
- If you want to save the entire window of the Zoom meeting, press Shift + Command + 3.

Once you’ve done this, you’ll see a thumbnail of your screenshot, which will automatically get saved on your desktop. Note that this will take a screenshot of your entire desktop.
- If you want to capture a part of the meeting, press and hold Shift + Command + 4.

Drag the crosshair to the part of the meeting that you want to capture. Release the trackpad or mouse, and the screenshot will be saved on your desktop.
How to Take Screenshot on Windows
You can also take screenshot on Windows 10 and 11 in two ways.
- If you’re capturing an entire screen, press the Windows key + PrtSc.
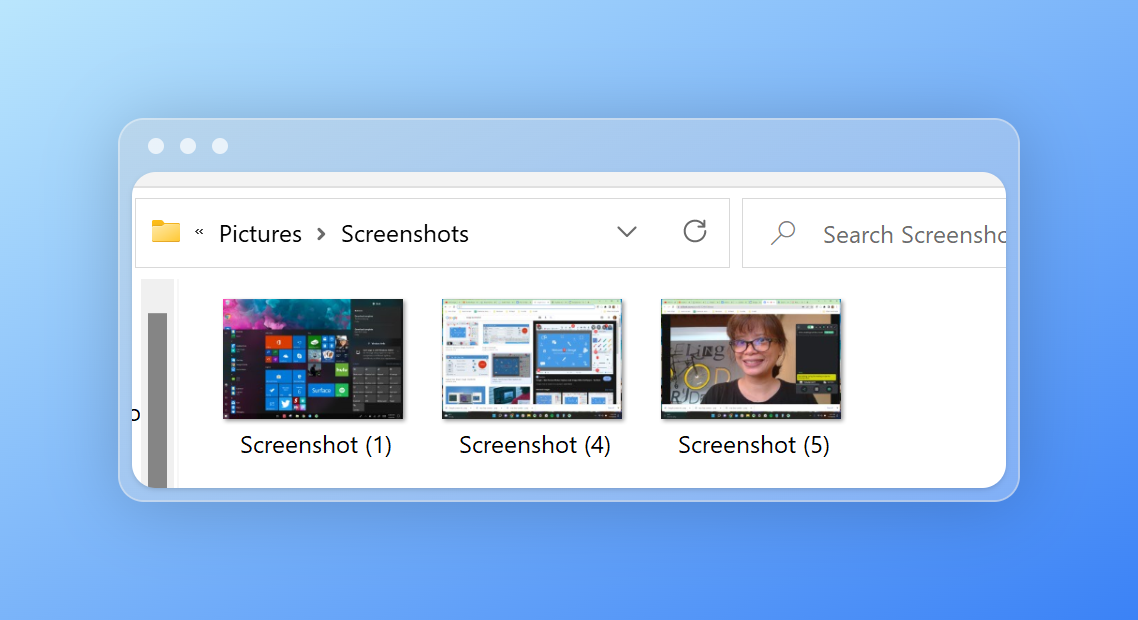
This will take a screenshot of your entire desktop and save it on the folder Screenshot under the Pictures folder.
- If you’re capturing a part of the Zoom meeting, press Windows logo key + Shift + S.
Drag the crosshair to the part of the meeting that you want to capture.
Paste the screenshot on a Google Doc, so you can keep all of the screenshots there instead of having to individually pasting and saving it on Paint.
Your built-in screenshot feature works great for the purpose of taking a Zoom screenshot.
Using Third-Party Screenshot Tools
Now, if you’re looking for more flexibility and extra features, you can always explore third-party tools.
Here are the top 3 tools:
Snagit
One such tool is Snagit, which is available for both Mac and Windows. Snagit allows you to take screenshots of your entire screen, selected regions, or specific windows. It also has several editing features that you can use to annotate your screenshots.
The tool will set you back a one-time fee of $62.99. But it’s a good investment if you also want to take advantage of its other features.
Lightshot
Another tool is Lightshot, which is available as a browser extension for Chrome, Firefox, and Edge. Lightshot allows you to take screenshots of your entire screen or selected regions.
But the cool thing about Lightshot is that it creates a link of each screenshot, so you can share it with anyone, anywhere without having to upload.
Awesome Screenshot
Another awesome tool that’s available as a Chrome extension is Awesome Screenshot. Just like Snagit and Lightshot, you can take screenshots of an app, including Zoom.
But one unique feature that may be helpful is that it takes full-page screenshots of web pages without having to scroll all the way down.
These are screenshot tools that not only help you take, edit, and share your screenshots easily. But it also has extra functionalities to improve your other work flows.
And speaking of improving workflows, there’s another Chrome extension that can take your note-taking in Zoom meeting to the next level.
{{rt_cta_ai-convenience}}
A Better Alternative for Taking Screenshots on Zoom
When taking a screenshot, you usually take it as part of your call notes. It’s okay when you take one or two screenshots. But once you have dozens, it will be harder to manage them.
You may also have taken notes on a separate document, but now you don’t know which screenshots go with your notes.
The ideal situation is when you take screenshots along with your notes. It will be even more impressive if a tool takes automatic notes for you!
With Tactiq, this is possible! You can:
- See transcripts in real-time during the Zoom call.
- Easily take screenshots with one click.
- Your screenshots are automatically saved, along with the highlights of your transcript.
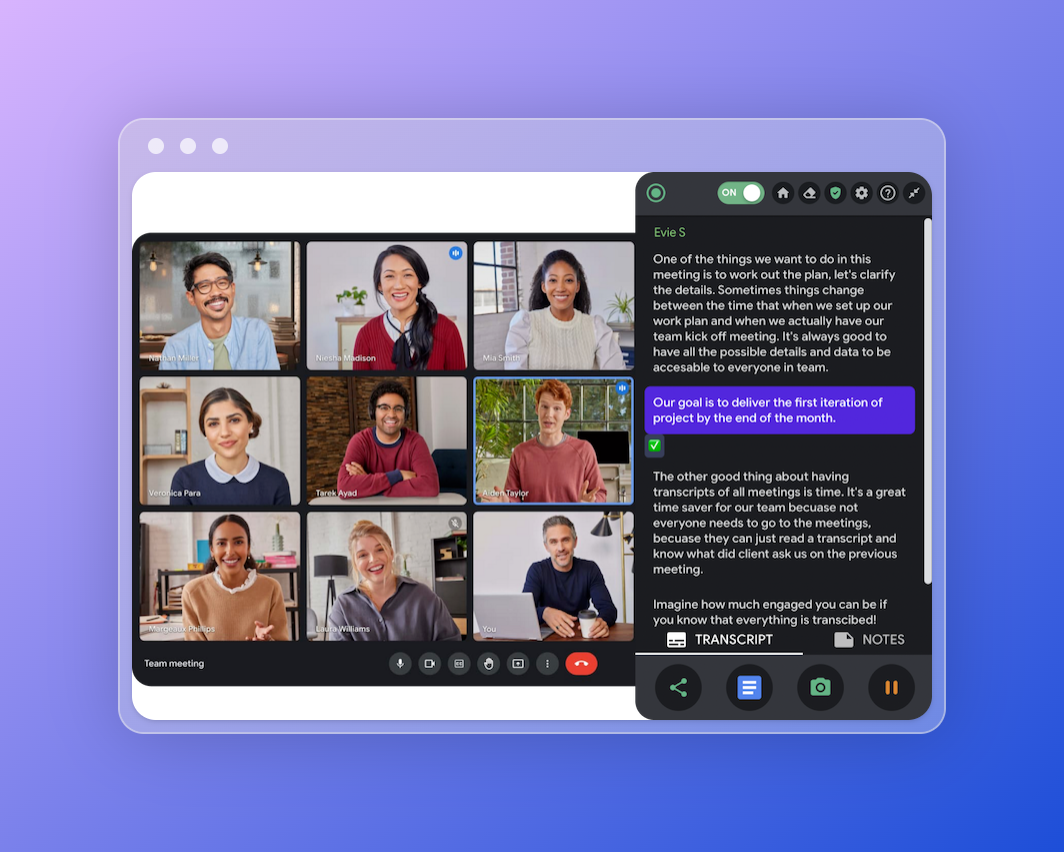
Instead of typing what was said, you can focus on listening and participating in the call. You can just highlight any interesting lines that you may want to review after the call is done.
It’s perfect for brainstorming sessions, retro calls, or onboarding new clients.
How to Take Screenshots on a Zoom Meeting Using Tactiq
- Install Tactiq on your Chrome browser.
- If you’re new to Tactiq, sign up for an account. It’s free! Login if you already have an account.
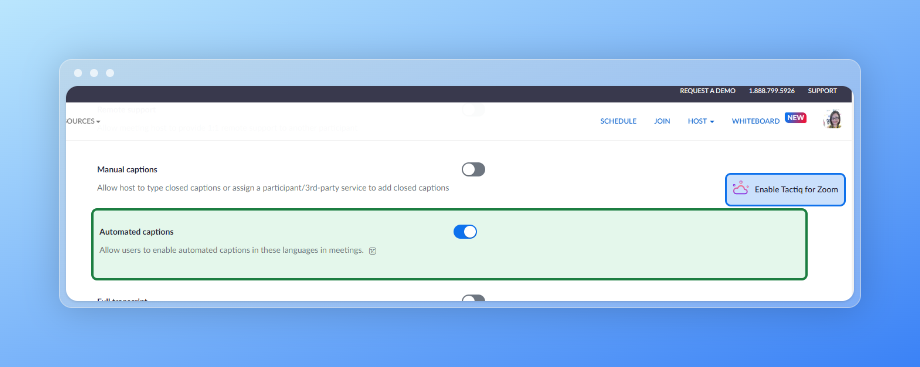
- If it’s your first time using Zoom with Tactiq, enable automated captions.
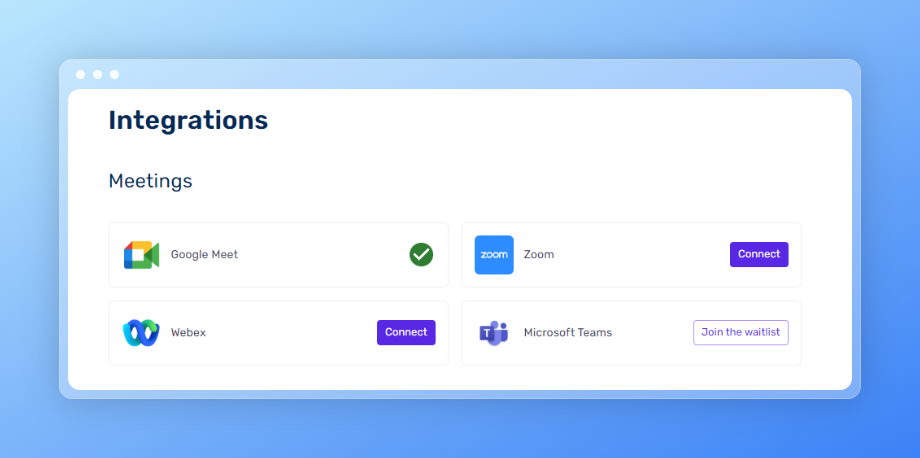
- If you’re already using Tactiq but haven’t turned it on for Zoom, go to the Integrations page. Click on “Connect” next to the Zoom icon.
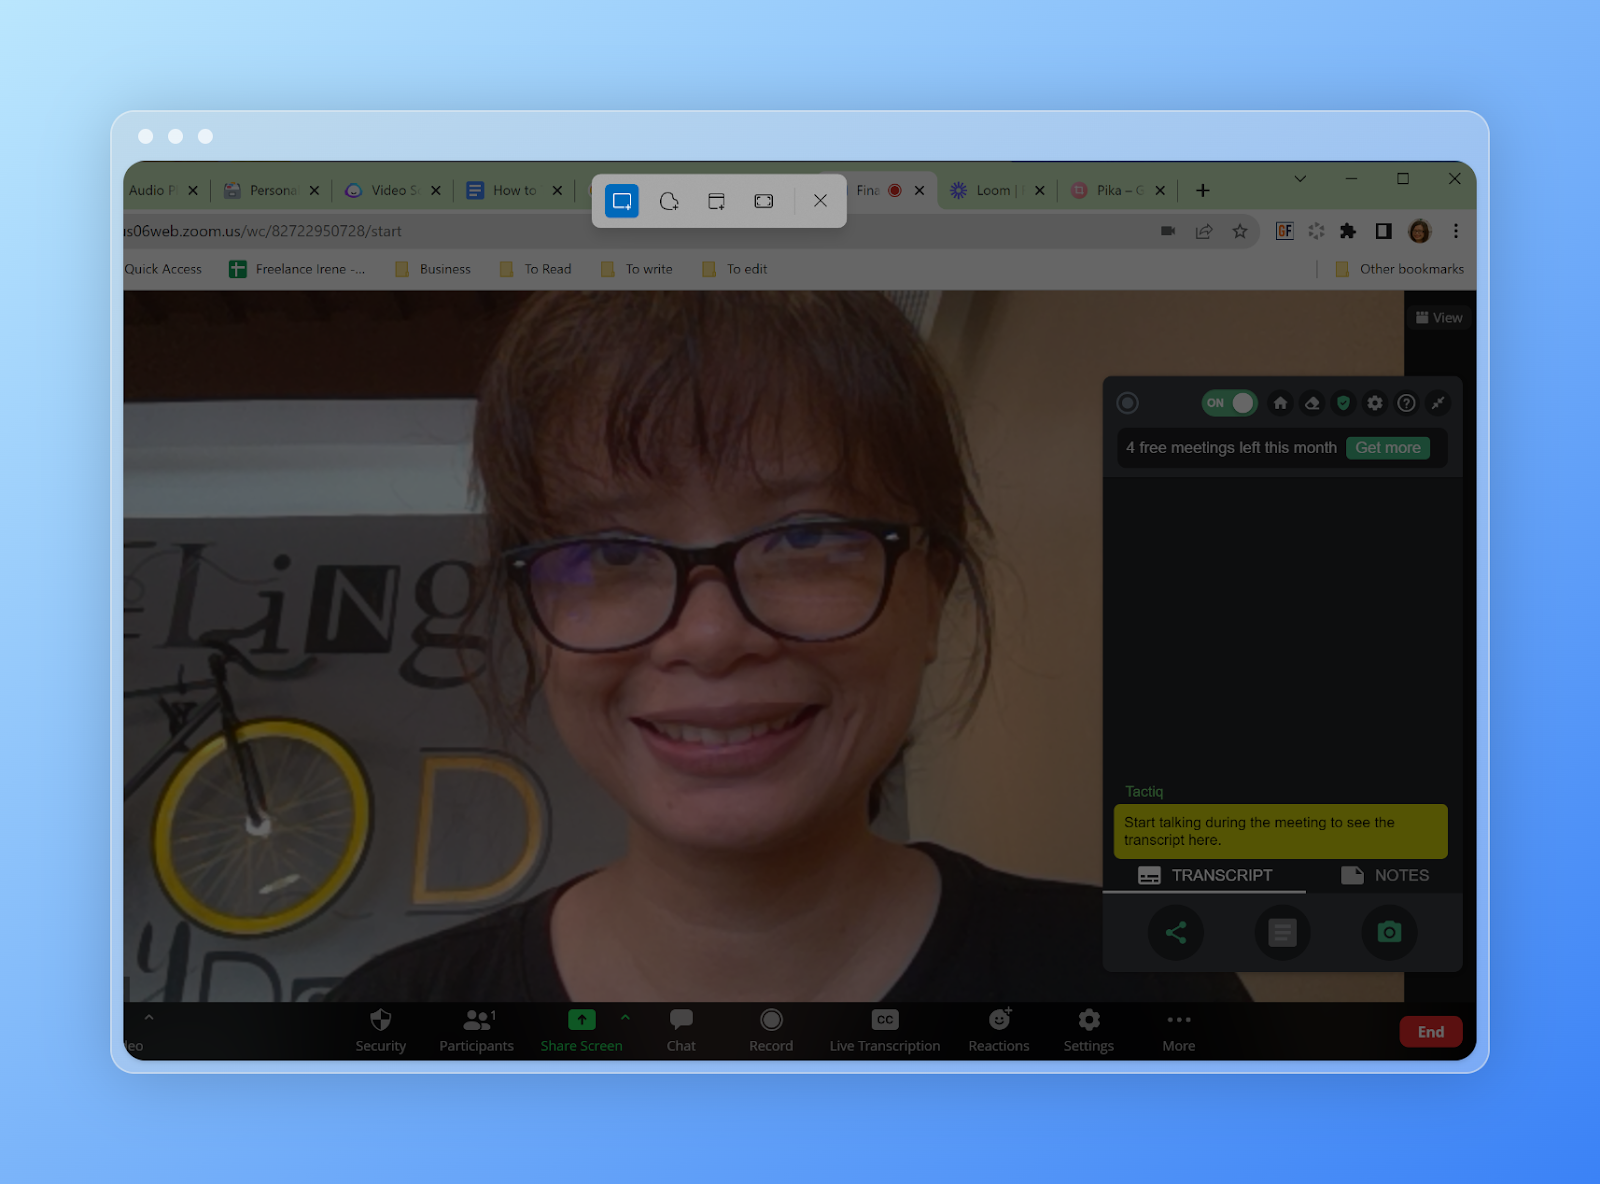
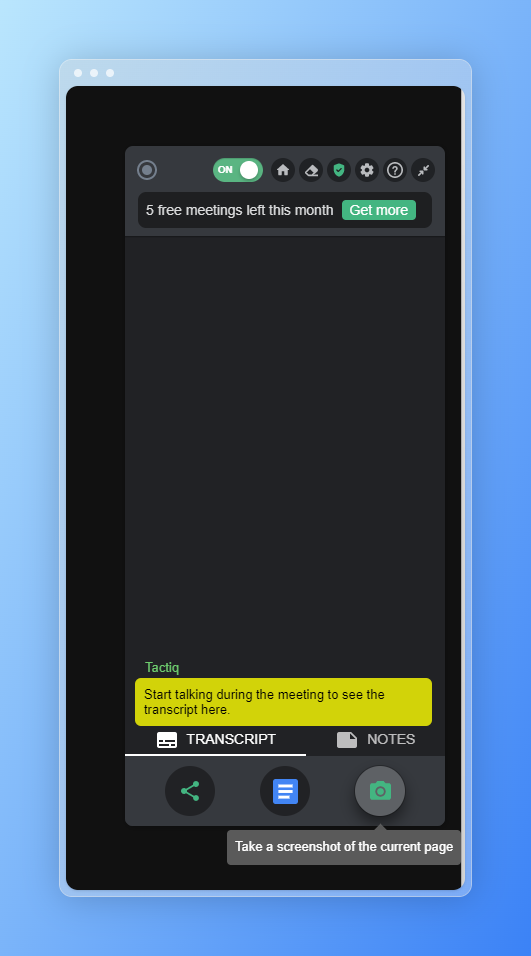
- Now, go to your Zoom meeting link as usual. Once you’re in the meeting, you’ll see a window on the lower right. Just click on the photo icon whenever you want to take a screenshot.
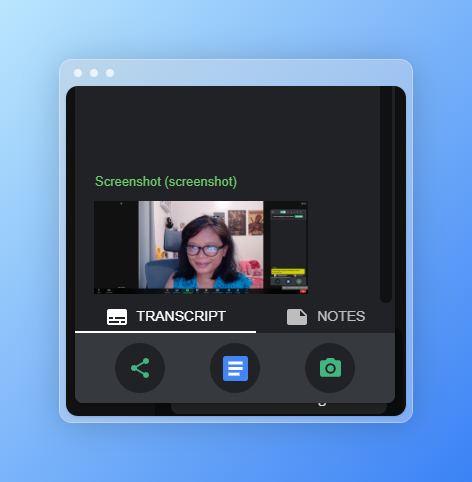
- You’ll see the preview of the screenshot. This will automatically get saved along with the transcript on your Tactiq account.
- All your screenshots are neatly arranged in one place, along with any highlights of your notes.

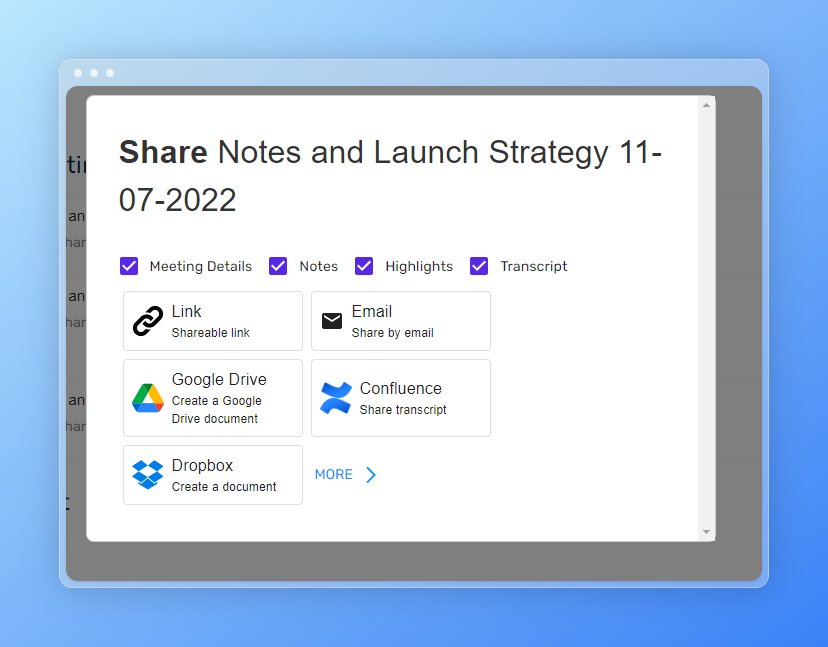
- If you’d like to share it with your team or client, you can download your notes as a PDF, save them on Google Drive, or create a shareable link.
Do you need to record your Zoom meetings, too? Here’s a way to do that if you’re a participant.
Wrapping It Up
There you have it! There are different ways to take screenshots of your Zoom meeting, from using built-in screenshot shortcuts on your computer to third-party software with more functionality. But if you want to take notes along with your screenshot on a Zoom meeting and keep everything in one place, Tactiq is your best bet.
You can press Shift + Command + 3 to capture the entire screen, or Shift + Command + 4 to select and capture a specific part of the screen. Your screenshot will automatically save to your desktop, making it easy to find and use later.
Press the Windows key + PrtSc to capture your entire screen, or Windows logo key + Shift + S to select a specific area. Screenshots are saved in your Pictures folder, so you can quickly access and organize them.
Third-party tools like Snagit, Lightshot, and Awesome Screenshot let you edit, annotate, and easily share your screenshots. These features help you communicate more clearly and streamline your workflow beyond basic screen capture.
Tactiq lets you take screenshots with one click and automatically saves them alongside real-time transcripts and highlights. This keeps your notes and visuals organized in one place, so you can focus on the meeting instead of manual note-taking.
Install Tactiq on Chrome, sign up or log in, and enable automated captions for Zoom. During your meeting, click the photo icon to take screenshots, which are saved with your transcript and highlights, making it easy to review, organize, and share your meeting notes.
Related articles


_Main.jpg)


Want the convenience of AI summaries?
Try Tactiq for your upcoming meeting.
Want the convenience of AI summaries?
Try Tactiq for your upcoming meeting.
Want the convenience of AI summaries?
Try Tactiq for your upcoming meeting.