How to Record Facetime with Audio
July 5, 2024
July 5, 2024
June 12, 2025
June 12, 2025

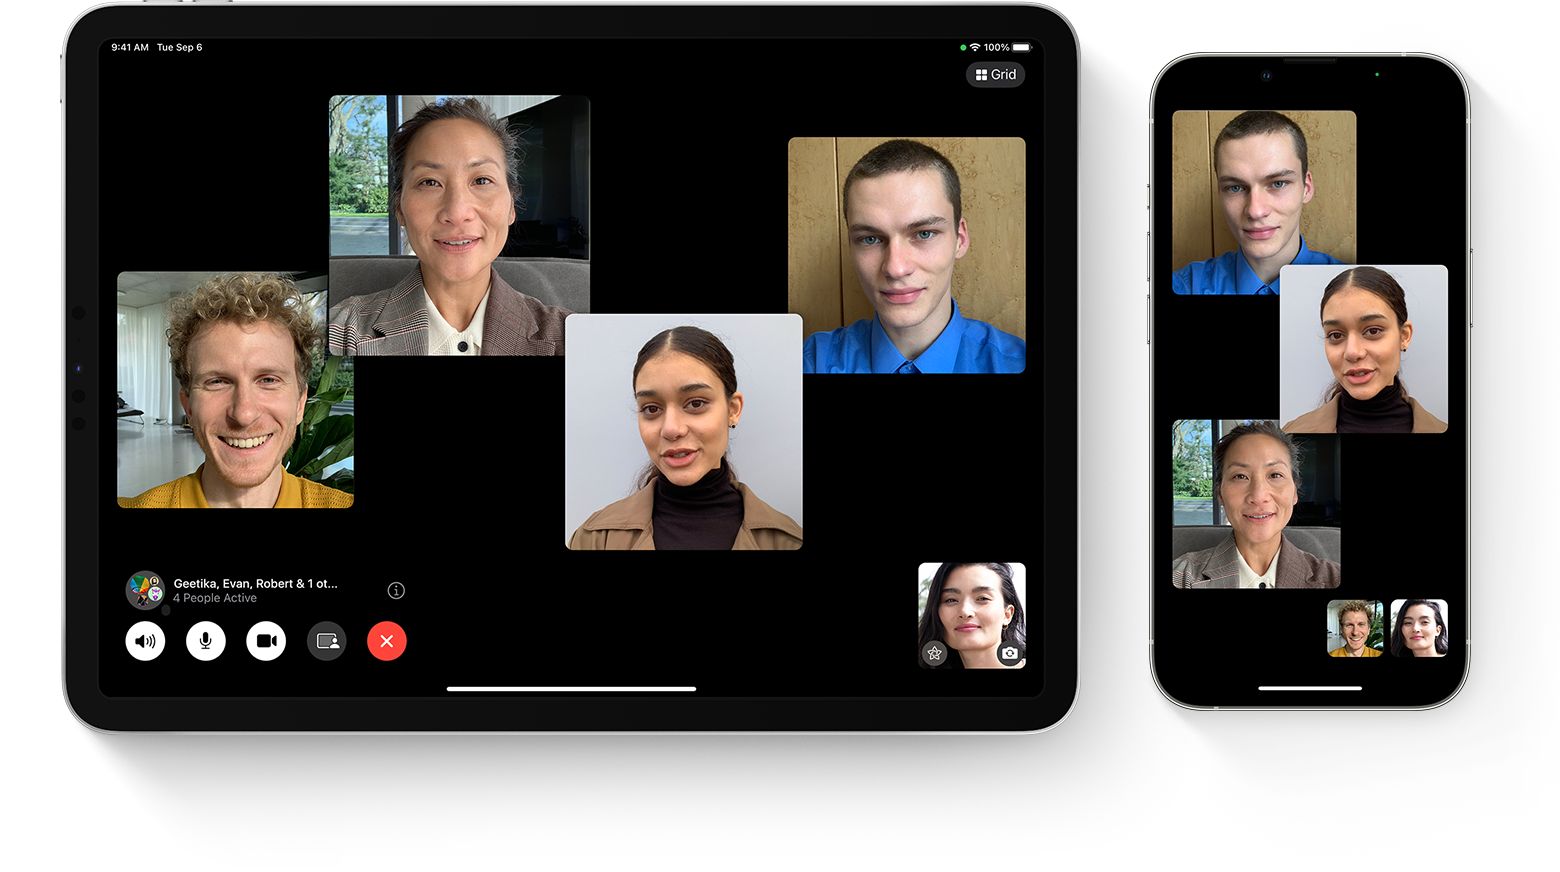
FaceTime is a popular way to communicate with your team members. If your FaceTime discussions involve project details and updates, you can save these conversations for later.
Whether it's an important client call, academic or journalistic research, or a team meeting, screen recording a FaceTime call with audio can be helpful in assigning tasks, keeping track of action items, and ensuring projects stay within the timeline.
In this guide, we will show you step-by-step instructions on how to record FaceTime calls with audio on your iOS devices. We'll also explain how to turn on live captions and transcribe your calls for easy reference.
How to Record FaceTime with Audio
Easily record a FaceTime call with audio on your Apple devices. Here's how to record FaceTime calls with audio if you're using an iPhone or an iPad:
- Open FaceTime. Launch the FaceTime app on your device.
- Start a FaceTime Call. Select a contact to begin a FaceTime call and click the video or audio call button.
- Access the Control Center. There are two ways to open the Control Center. For iPhone X or later models, swipe down from the top-right corner of your screen. For iPhone 8 or earlier models, swipe up from the bottom of the screen.
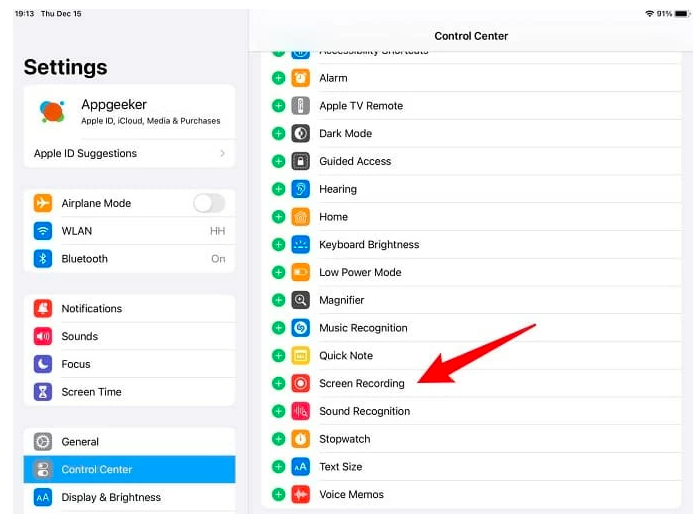
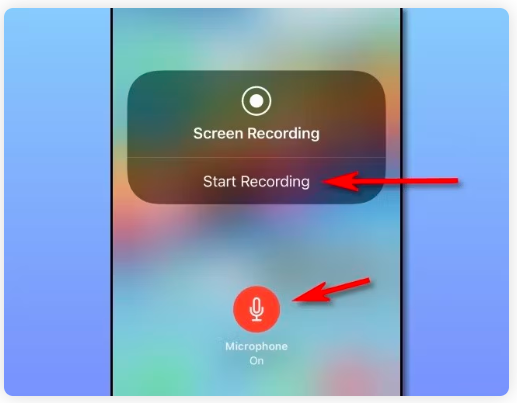
- Enable Screen Recording. To screen record, go to the Control Center and look for the screen recording icon, which looks like a filled circle inside another circle. If you don't see it, go to Settings > Control Center > Customize Controls, and add Screen Recording.
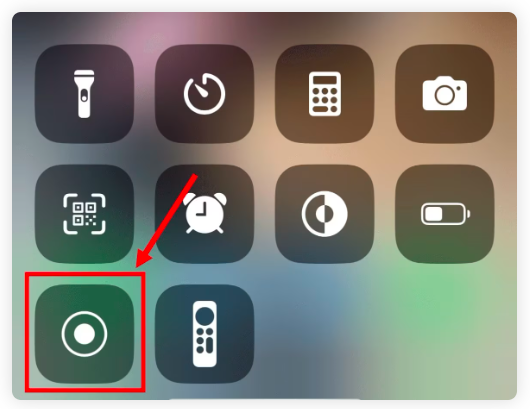
- Record with Audio. Long-press the screen recording button, and a menu will appear. Tap the microphone icon to allow audio recording. Then, tap Start Recording.
- Return to FaceTime. Go back to your FaceTime call. Your device is now recording both the screen and audio.
- End Recording. To stop recording, open the Control Center again and tap the red screen recording button to save the video on your Photos app.
As an iOS user, recording FaceTime calls with audio on your Mac device can be done by following these steps:
- Start Your FaceTime Call. Start your FaceTime call on your Mac screen.
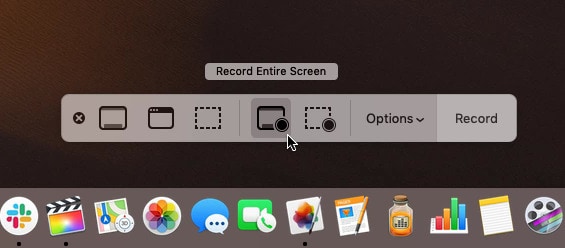
- Open Screen Recording Utility. Press CMD + Shift + 5 to open the screen recording utility window. Then select the Options menu and tap the microphone to record with audio.

- Click 'Record Entire Screen'. In the screen recording utility window, choose Record Entire Screen.
- Select FaceTime. From the drop-down menu bar, select FaceTime as the application to record.
- Click Record. Tap the Record button to start recording your FaceTime call.
- End Recording. Once done with your call, click CMD + Control + Esc to reopen the screen recording utility window. Then, click the Stop button.
- Locate the Recording. Your FaceTime recording will be saved in your Mac's Movies folder with a timestamp for easy reference.
Now you've successfully recorded your FaceTime call with audio!
How to Turn on Live Captions on FaceTime
FaceTime live captions is a useful feature from Apple that transcribes FaceTime calls in real-time, making conversations accessible for everyone, especially those who are deaf or hard of hearing. Imagine having subtitles for your video chats!
How to turn on FaceTime live captions from iPhone
Follow these steps to turn on FaceTime live captions when using an iPhone:
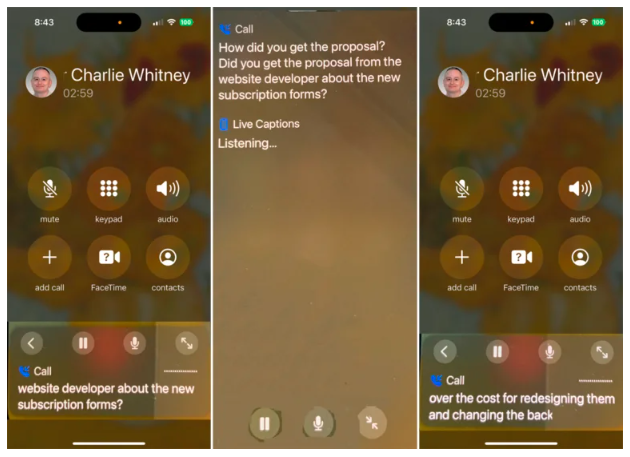
- Show FaceTime Controls. During your FaceTime video call, tap the screen if the FaceTime controls are not visible.
- Access Info Button. Tap the Info button located at the top of the FaceTime controls.
- Enable Live Captions. Turn on the Live Captions option.
- Confirm Settings. Tap Done to apply the settings.
- View Live Captions. A Live Captions window will appear near the top of the screen, displaying the call's automatically transcribed dialogue and indicating who is speaking.
How to turn on FaceTime live captions from Mac
You can also turn on FaceTime live captions on your Mac:
- Start a Video Call. Begin your video call using the FaceTime app on your Mac.
- Open the Sidebar. If the sidebar is absent, click the Sidebar button at the bottom of the FaceTime window.
- Select Live Captions. In the sidebar, select the option for Live Captions.
- Download the Language Model. If prompted, click Download to download the language model necessary for generating and displaying automatic captions. Once downloaded, the automatic captions will be generated and displayed during your FaceTime call.
With live captions, you can read what's being said in real-time, making your conversations more transparent and accessible.
How to Transcribe Your FaceTime Calls
Transcribing FaceTime calls can help keep records, study conversations, do journalistic research, or share important details. Follow these steps to transcribe your calls:
- Record Your Call. Follow the steps in the first section to record your FaceTime call with audio.
- Transfer the Recording. Once your recording is saved in the Photos app, transfer it to your computer using AirDrop, email, or a USB cable.
- Choose a Transcription Service. Many transcription services are available, both free and paid. Try Tactiq to maximize your FaceTime call recordings!
- Upload Your Recording. Open the transcription service of your choice and upload your FaceTime recording.
- Review and Edit. Once the transcription is complete, review it for accuracy.
- Save or Share the Transcription. Save the transcription to your computer or share it with others as needed.
Transcribing your FaceTime calls ensures you have a written record of meaningful conversations that you can refer to anytime. You can download and install Tactiq from the Chrome Web Store and upload your recording.
Why Use Tactiq to Transcribe Your FaceTime Calls
Tactiq is a powerful tool that makes transcribing your FaceTime calls easy and efficient. Here's why you should consider using Tactiq:
- Accuracy. Tactiq provides highly accurate transcriptions, reducing the time you must spend on editing and corrections.
- User-Friendly Interface. Tactiq's interface is intuitive and easy to use so that you can upload, transcribe, and access your meeting recordings and transcriptions with just a few clicks!
- Real-Time Transcriptions. Tactiq offers real-time transcription capabilities, allowing you to see the text appear as you speak, making it perfect for meetings and interviews.
- Integration with Other Tools. Tactiq seamlessly integrates with other productivity tools, such as Google Docs and Slack, making sharing and collaborating on your transcriptions easy.
- Supports multiple languages. Tactiq supports over 60 languages, allowing you to transcribe calls in the language of your choice.
Using Tactiq to transcribe your FaceTime video calls saves time and ensures you have reliable and accurate records of your conversations.
Use Tactiq to Maximize your FaceTime Calls
Recording your FaceTime calls can boost your communication game. Screen recording with audio is a handy way to review conversations and improve team collaboration. By using these recording methods, you can easily revisit your FaceTime call and catch every point, making everything more efficient and helping everyone stay on the same page.
Record FaceTime calls with audio, enable live captions, and transcribe your calls to improve your team's communication experience. Transcribe and summarize your FaceTime calls with Tactiq to take your team collaboration to the next level!
To record a FaceTime call with audio, open FaceTime, start your call, access the Control Center, and enable the screen recording feature. Long-press the recording button, tap the microphone icon to include audio, then start recording so you can capture both video and sound for later reference.
Start your FaceTime call, press CMD + Shift + 5 to open the screen recording utility, select the microphone option for audio, and choose 'Record Entire Screen.' After your call, stop the recording and find the saved file in your Mac's Movies folder, making it easy to review or share important discussions.
Live captions transcribe your FaceTime calls in real-time, displaying subtitles of the conversation and indicating who is speaking. This feature makes your calls more accessible and ensures everyone can follow along, especially if you or your team members are deaf or hard of hearing.
Transcribing your FaceTime calls with Tactiq gives you accurate, searchable records of your conversations, saving you time on manual note-taking. You can easily upload your recordings, review and edit the transcripts, and share them with your team to keep everyone aligned and productive.
Tactiq offers highly accurate, real-time transcriptions and a user-friendly interface, so you can quickly access and share your meeting notes. Its integration with tools like Google Docs and Slack, plus support for over 60 languages, helps you collaborate efficiently and stay organized.
Related articles


Want the convenience of AI summaries?
Try Tactiq for your upcoming meeting.
Want the convenience of AI summaries?
Try Tactiq for your upcoming meeting.
Want the convenience of AI summaries?
Try Tactiq for your upcoming meeting.