Enable Waiting Room in Zoom: Step-by-Step Guide
August 11, 2024
August 11, 2024
May 11, 2026
May 11, 2026

Zoom's waiting room is one of the simplest ways to keep your meetings secure and organized. As the meeting host, you decide who gets in and when. No uninvited guests or disruptions mid-session.
The waiting room feature has also gotten a significant upgrade. With Zoom Workplace v6.7.0, the interface has been updated: it is cleaner and faster to navigate. You can now add Zoom Clips, AI avatar greetings, and custom branding to the waiting room experience.
In this guide, you'll learn:
- What the Zoom waiting room is and why it matters
- How to enable the waiting room in Zoom via the web portal, desktop app, and during a live meeting
- How to manage waiting room participants effectively
- How to customize the waiting room with logos, videos, Zoom Clips, and AI avatars
- How to troubleshoot common waiting room issues
New to Zoom? Check out how to create a Zoom meeting link and The Complete Zoom Guide before diving in.
How to Enable the Zoom Waiting Room: Step-by-Step (2026)
You can enable the waiting room in Zoom in three ways: through the Zoom web portal, through the Zoom Workplace desktop app, or directly during a live meeting. All three methods are covered below.
Via the Zoom web portal (zoom.us)
1. Go to zoom.us and sign in to your Zoom account.
2. Click Settings in the left-side navigation panel under "Personal."
3. Select the Meeting tab.
4. Scroll down to the Security section.
5. Toggle Enable Waiting Room on.

6. Once enabled, click Edit Options to select who should go into the waiting room:
- Everyone - all participants joining the meeting
- Users not in your account - only external participants
- Users who are not in your account and not part of your whitelisted domains - external participants outside approved domains
- Users not on the meeting invite - anyone not directly invited via calendar
- Users not in your organization - anyone outside your organization
7. Click Continue to save your settings.
💡 Pro tip: Enable the waiting room before admitting anyone, then use Tactiq to auto-capture the transcript the moment the session begins. No setup needed mid-call. Tactiq starts working the instant the meeting does.
Via the Zoom Workplace app
The Zoom Workplace desktop app does not have a standalone waiting room toggle in its Settings panel. To enable or disable the waiting room for all future meetings, use the Zoom web portal method above. Changes made there apply automatically to your account.
To enable the waiting room for a specific scheduled meeting, open the Zoom Workplace app, go to the Meetings tab in the left navigation panel, and select or edit an existing meeting. Under Meeting Options, check Waiting Room and save..

During a live meeting
1. Click Host Tools in the in-meeting toolbar. This replaces the old "Security" button as of v6.7.0.
2. Toggle Enable Waiting Room on or off for that particular meeting.

Note: If you enable or disable the waiting room mid-meeting this way, participants already in the meeting are not affected. Only participants joining after the change will go to the waiting room.
How to Capture Every Zoom Meeting Automatically with Tactiq
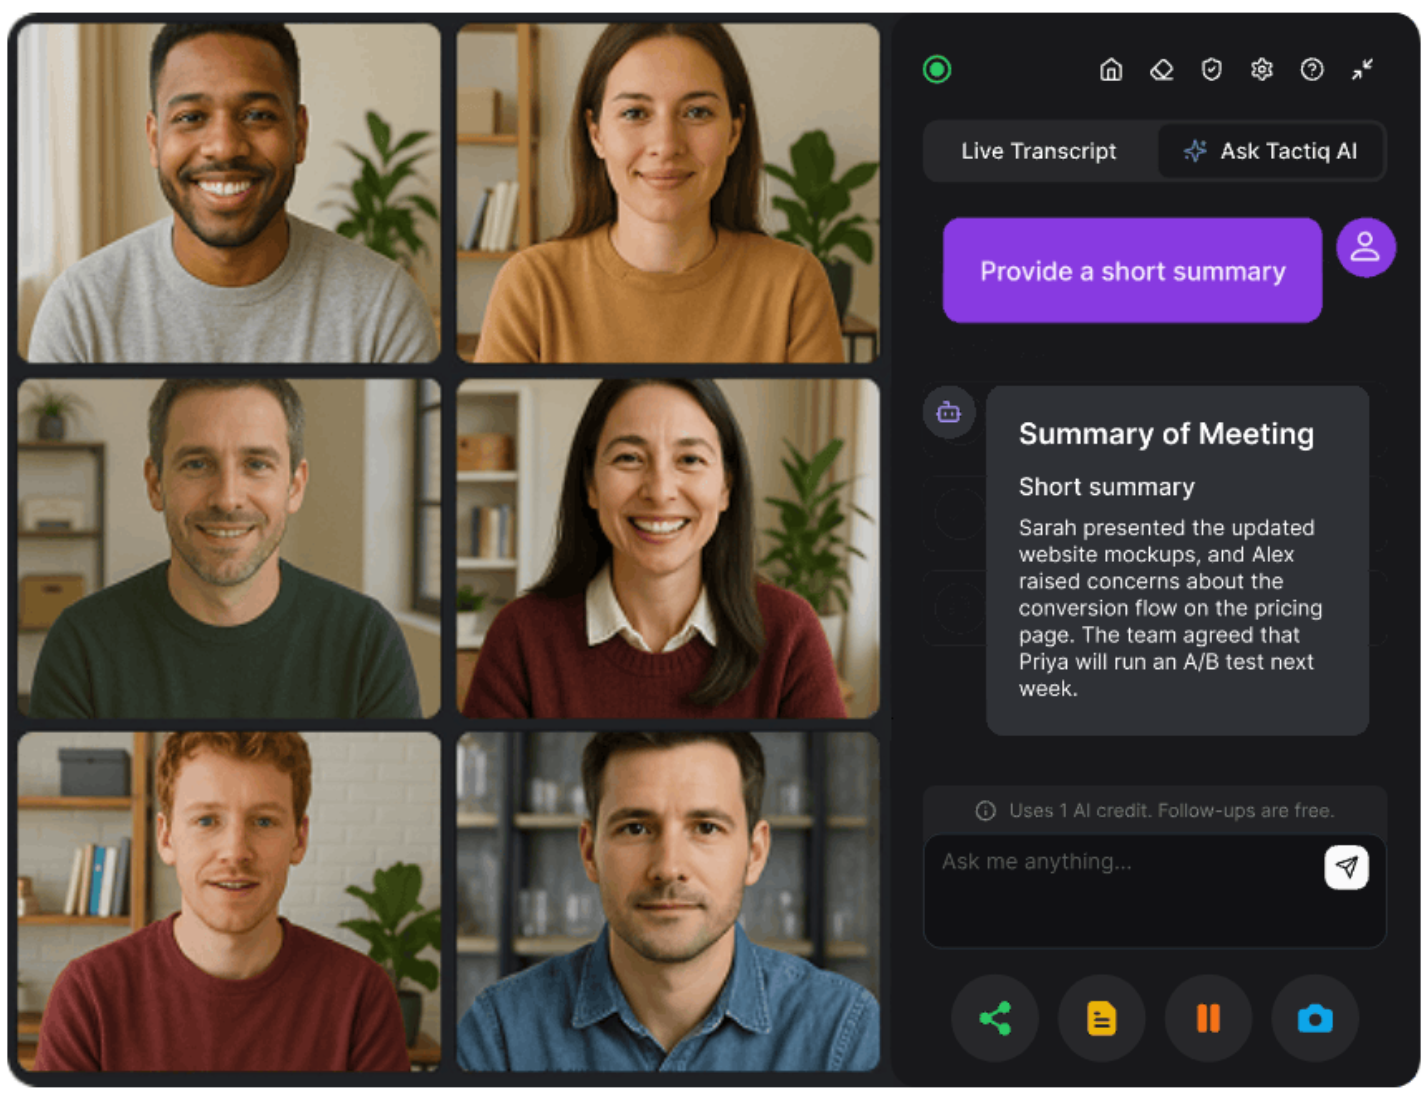
Most meeting tools send a bot into your call. Tactiq works differently. The Tactiq Chrome extension runs directly in your browser. No bot joining as a participant.
While meeting participants are still in the waiting room, Tactiq is already loaded and ready. The moment you admit the first person and the meeting begins, transcription starts automatically.
From there, Tactiq gives you a full set of AI-powered tools to turn that transcript into something useful:
- Real-time transcription - every word captured as the conversation happens, so you stay focused on the discussion instead of your notes
- AI meeting summaries - a structured recap of key points generated as soon as the meeting ends
- AI workflows - automate repetitive post-meeting tasks like writing follow-up emails, creating action items, or logging notes to your tools of choice. Explore Zoom AI workflows to see what's possible.
- Transcript export - send your transcript directly to ChatGPT, Claude, Notion, or any other AI platform you already use. Need to find an old meeting? Learn how to find Zoom transcripts.
Tactiq is free to get started and works without a paid Zoom Workplace plan. You can also start a Zoom meeting from Slack and have Tactiq ready to capture it from the first word.
Install the free Tactiq Chrome extension today.
{{rt_cta_ai-convenience}}
How to Manage Participants in the Waiting Room
Once the waiting room is enabled, you have full control over who enters your meeting and when. Here's how to manage waiting room participants effectively.
Admitting participants individually
When a participant joins the waiting room, you'll see a notification in the meeting. To admit them:
1. Click Participants in the meeting toolbar.
2. Find the participant's name in the waiting room list.
3. Click Admit next to their name to let them in.
Admitting all participants at once
1. Click Participants in the meeting toolbar.
2. Click Admit All at the top of the waiting room list.
Renaming participants in the waiting room
Hosts can rename participants while they're still in the waiting room. This is useful for large events where attendees join with unclear display names.
1. Click Participants to open the participant list.
2. In the waiting room section, click the three-dot icon next to the participant's name.
3. Click Rename, enter the new name, and click Change.
The participant will receive a notification that the host renamed them. Clicking OK does not admit them. You still need to admit them separately.
Recurring meeting session display
For recurring meetings, the waiting room now shows participants the start time and date of the next scheduled session when they join before the host. The screen displays "Starting at" followed by the session's time and date. This reduces confusion for participants who join a recurring meeting at the wrong time.
Tips for managing large meetings
- Pre-assign co-hosts before the meeting so others can help admit participants alongside you.
- Admit in small groups rather than all at once to keep the start organized.
- Send a message to the waiting room via the Chat panel to let participants know you'll admit them shortly.
- Lock the meeting via Host Tools once all expected participants are in.
How to Customize the Zoom Waiting Room
Customizing your waiting room gives participants a polished first impression before the meeting even starts. Here's what you can change and how.
Opening the customize panel
1. Sign in to the Zoom web portal at zoom.us.
2. Click Settings in the left-side navigation panel.
3. Scroll to the Security section and ensure Enable Waiting Room is toggled on.
4. Click Customize Waiting Room.
Choosing what participants see
In the Customize Waiting Room panel, select what participants will see while they wait:
- An image - choose between the default AI Companion image or upload your own. Supported formats are GIF, JPG, and PNG, up to 1MB.
- A logo and description - upload your logo (GIF, JPG, or PNG, between 60x60 and 400x400 pixels, up to 1MB) and add a description of up to 400 characters.
- A video - upload a welcome video in MP4, MOV, or M4V format, up to 30MB. Videos are muted by default. This option requires a paid Zoom account.

You can also add a Title at the top of the panel.
Use the desktop and mobile toggle in the preview panel on the right to see how your waiting room will appear on each device before saving.
Zoom Clips in the waiting room
Hosts can select an existing Zoom Clip from their library to play in the waiting room, replacing or supplementing a static image with dynamic video content. This is one of the most useful waiting room upgrades in recent releases.
To add a Zoom Clip to the waiting room:
1. Go to Waiting Room settings and click Customize Waiting Room.
2. Select A video, then choose from your Zoom Clips library.
3. Click Save.
For a closer look at how Zoom Clips work, watch this overview:
AI avatar clips for waiting rooms
At the top of the Customize Waiting Room panel, you'll see a prompt to create an AI Avatar clip to greet participants.
Hosts with a paid Zoom Workplace account and AI Companion can generate an avatar version of themselves to welcome participants. Use it to share the meeting agenda, introduce yourself to new clients, or explain joining instructions without recording yourself on camera.
You provide a script, and AI Companion generates the clip using your avatar's likeness and voice. Paid Zoom Workplace accounts include up to three minutes of avatar clip generation per month. The Custom AI Companion add-on ($12/user/month) unlocks additional generation time each month. All avatar-generated clips include built-in AI watermarking.
Consistent branding across your organization
Account admins can manage waiting room customization at the account or group level, ensuring all hosts in the organization show a consistent branded experience to participants. These settings are found under Settings > Meeting tab > Security section > Waiting Room Options > Customize Waiting Room.
Troubleshooting the Zoom Waiting Room
If your waiting room isn't behaving as expected, here are the most common issues and how to fix them.
Participants are bypassing the waiting room
Check that the waiting room is enabled for the correct participant types. Sign in to the Zoom web portal, go to Settings > Meeting tab > Security section, and confirm the Enable Waiting Room toggle is on. Then click Edit options, check the "Who should go into the waiting room" setting, and adjust it to match your needs.
The waiting room isn't appearing during a live meeting
If you need to enable or disable the waiting room mid-meeting, click Host Tools in the in-meeting toolbar (check under More if you don't see it) and toggle the waiting room on. Note that this only affects participants joining after the change.
Participants can't join after being admitted
This is usually a connectivity issue. Ask the participant to check their internet connection and try rejoining. If the problem persists, remove them from the waiting room and have them rejoin using the meeting link.
The waiting room is greyed out and can't be enabled
This typically means your account admin has locked the setting at the account or group level, preventing individual hosts from changing it. Contact your Zoom account admin to adjust the setting or unlock it for your account.
The new waiting room interface isn't showing
The enhanced waiting room interface, which includes a larger camera and audio preview panel, requires Zoom Workplace v6.7.0 or later. If you're still seeing the old interface, update your Zoom Workplace app. Click your profile picture in the top-right corner of the app and select Check for Updates.
Make Every Zoom Meeting More Secure and Productive
The Zoom waiting room is a simple but powerful way to keep your meetings secure and professional. With the updates in Zoom Workplace v6.7.0, it's also more flexible than before. From custom branding and Zoom Clips to AI avatar greetings, you have full control over how participants experience your meetings before they even begin.
Once the meeting starts, let Tactiq handle the rest. Install Tactiq and get an automatic transcript, AI summary, and ready-to-use workflows from every Zoom meeting. No setup required.
FAQs on Enabling Zoom Waiting Room
How do you enable the Zoom waiting room?
Sign in to zoom.us, click Settings in the left navigation panel, go to the Meeting tab, scroll to the Security section, and toggle Enable Waiting Room on.
Why is the waiting room greyed out in Zoom?
Your account admin has likely locked this setting at the account or group level. Contact your Zoom admin to enable or unlock it for your account.
Does the Zoom waiting room work on mobile?
Yes. The waiting room feature works on the Zoom mobile app for both Android and iOS. Hosts can admit participants directly from the mobile participant list.
Can I play a video in the Zoom waiting room?
Yes. Paid Zoom accounts can upload a welcome video or add a Zoom Clip from their library to play in the waiting room. Go to Settings > Customize Waiting Room and select the video option.
Is the Zoom waiting room free?
Yes. The basic waiting room feature is available on all Zoom accounts, including free plans. Advanced customization options like welcome videos and AI avatar clips require a paid Zoom Workplace account.
The Zoom Waiting Room is a feature that lets you control who enters your meetings by placing participants in a virtual holding area until you admit them. Using it helps you keep meetings secure, prevent unwanted guests, and maintain a professional, organized environment.
To enable the Waiting Room, log in to the Zoom web portal, go to 'Settings' under the 'Personal' section, find the 'Security' section in the 'Meeting' tab, and toggle on the 'Waiting Room' option. This simple setup gives you more control over who joins your meetings.
You can admit participants individually or all at once from the 'Manage Participants' panel. For large meetings, pre-assign co-hosts, admit people in small groups, and provide clear instructions in the Waiting Room message to keep things running smoothly.
You can add a custom message, upload your logo, and even include a welcome video or personalized greeting. Customizing the Waiting Room builds trust, reinforces your brand, and helps participants feel informed and valued before joining.
Tactiq provides live transcriptions, AI-generated summaries, and customizable meeting kits, so you capture every detail and automate follow-up tasks. By using Tactiq, you save time, reduce manual work, and ensure your meetings are productive and well-documented.
Related articles


_Main.jpg)


Want the convenience of AI summaries?
Try Tactiq for your upcoming meeting.
Want the convenience of AI summaries?
Try Tactiq for your upcoming meeting.
Want the convenience of AI summaries?
Try Tactiq for your upcoming meeting.